JAZAMA! PAJAMA! PAJAMA !!
Since I’ve started 3D printing I’ve always had the desire to sculpt, which I knew nothing of. It has taken me years to understand Blender enough just to sculpt.
I got the courage the other night to try my hand at sculpting a long time idea, and a model I’ve once tried to make, but came out looking like a donut with spikes.The model??
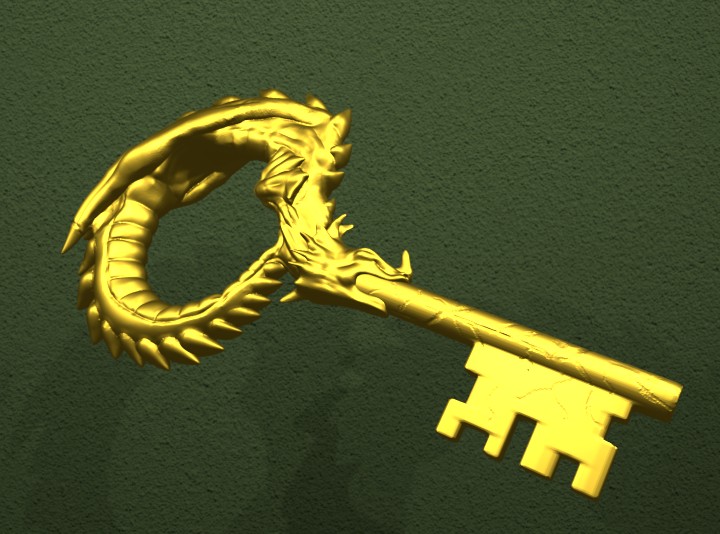
The key from Little Nemo!! 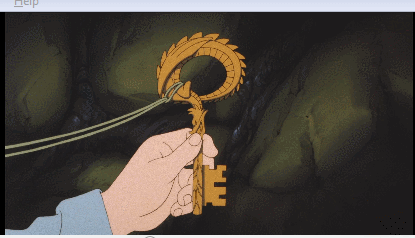
I can remember the impact this movie made on me as a kid. Scary Nightmare Land, a boy out for adventure. The awesome animation. it was a great movie!
If you have never seen Little Nemo, I’d advise you go watch it! Definitely a great children’s fairy tale.
I couldn’t really find many references online to the Key. I took a snapshot of the GIF and used it as a reference point.
I started off with the body, I added a Torus and gave it 64 major segments and 64 minor segments. giving it 4,096 verts to play around with.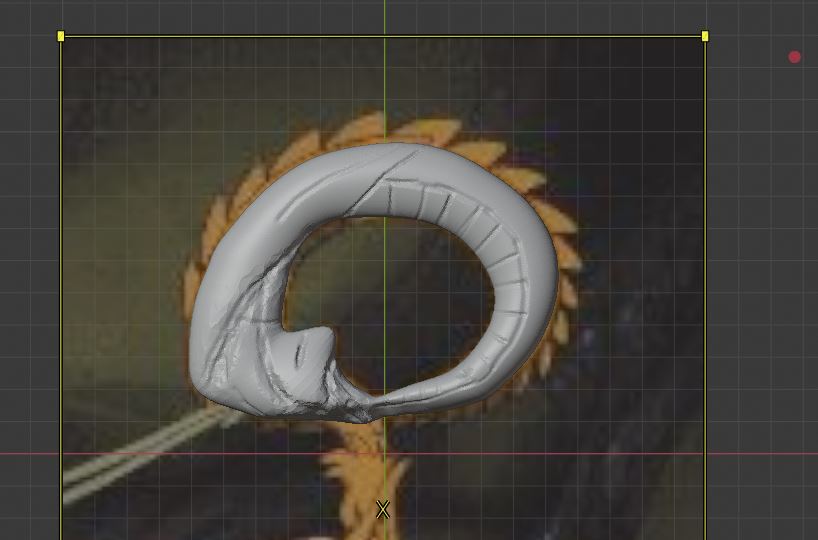
I basically just layed out all the shapes. Get those creative juices flowing!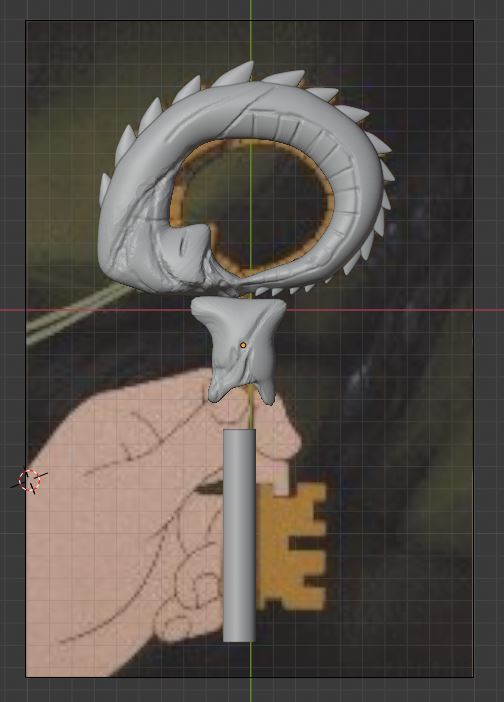
I roughed out all the major parts. Using the Blender Sculpt Tools, I make points of reference with markings. When I had enough I figured i’d go off imagination.

I began sculpting the body and back wings using tummy scales with the crease tool. not sure what to make of the legs, I decided to go with smaller wings instead.
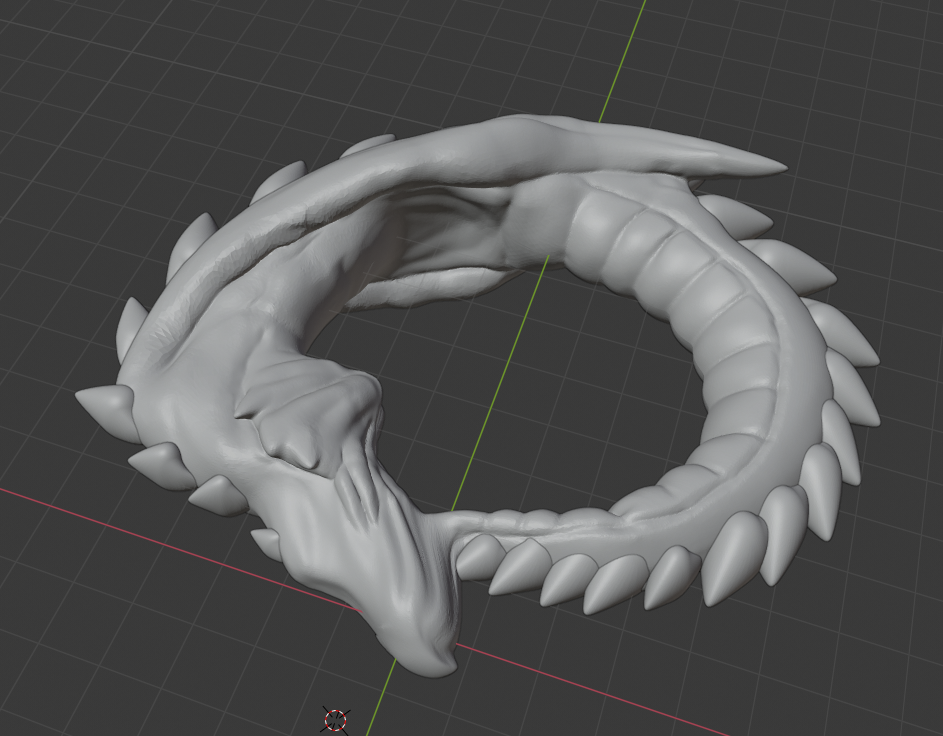
After I had a good rough out of the body, started to make back scales. for this I took a UV sphere, and did 64×64 lines, scaled and moved it around until it looked something like a scale, after one, I duplicated 24 times and moved them around to fit.
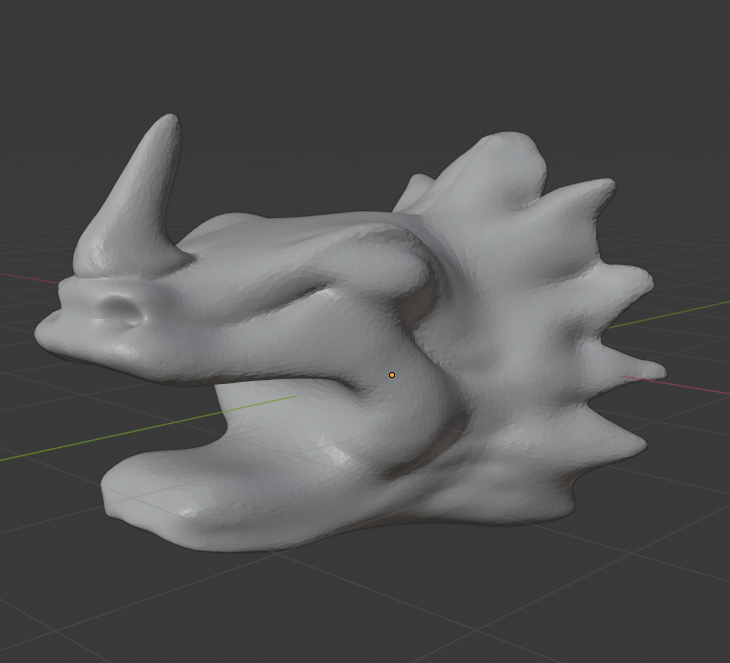
Time to get started on the head, again I made a UV sphere with 64×64 lines, shaped it to what I thought it would look like. added a horn on top and some scales on the side of the head, making it look kinda like a dragon. I was thinking of pulling another Mesh from thingiverse, but that would have been lazy. Never going to learn if you don’t do it yourself!
Head and body seems to be well roughed out. I thought it was time to move onto the Key part.
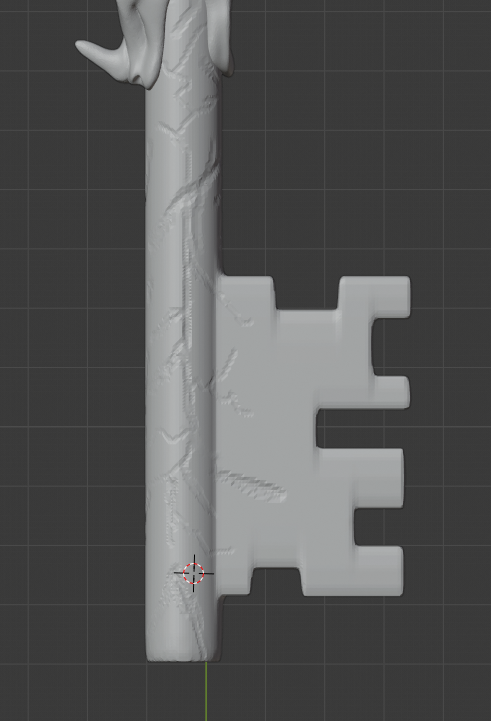
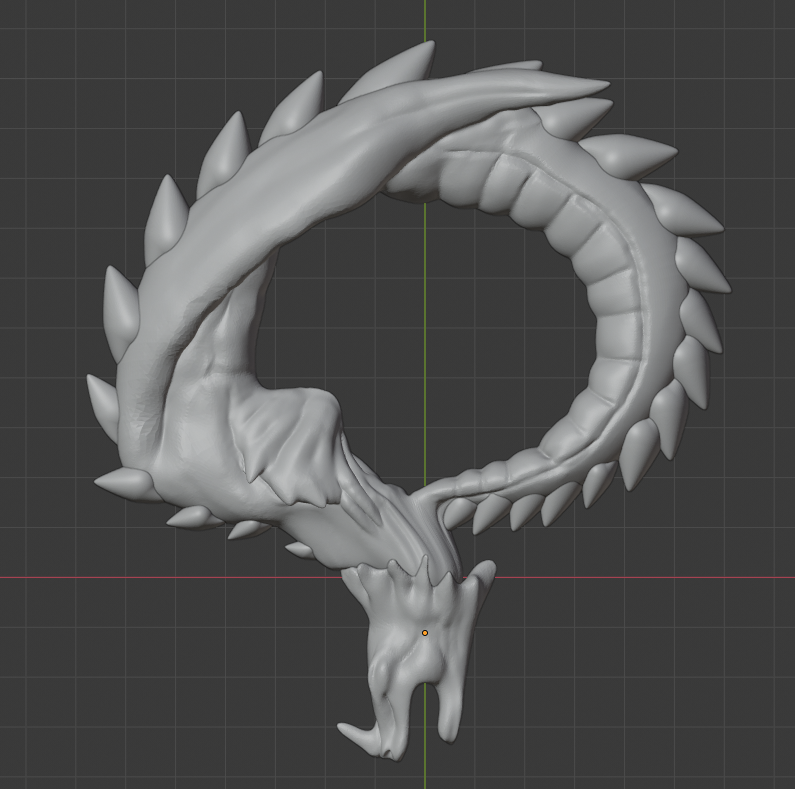
Took a Cylinder and added 64 rings, and used the loop cut for another 64, scaled it to fit the mouth of the dragon and applied the scale to the cylinder. Also did a re-mesh make the cylinder symmetrical. It started to look funny, but the remesh took care of. I mirrored the Y axis, and sculpted lines across it. Tracing the key teeth from the image. from a single plain, and solidifying it to fit a key shape.
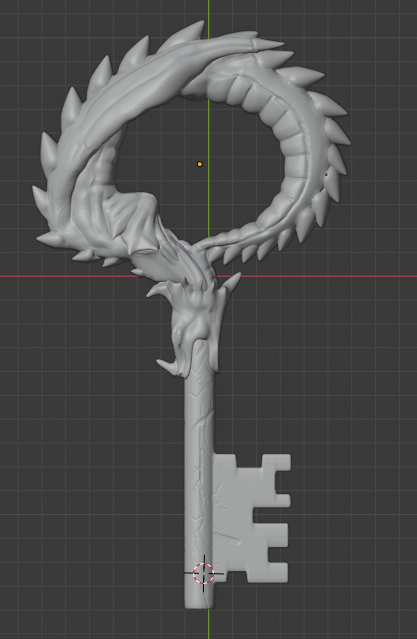
Finally! Stared looking perfect! I did some final touch ups to the scales, made the look like they were in the skin, made the tail look like it was touching the neck of the dragon. once all pieces were sculpted I did a Boolean to each piece until the mesh was water tight. And it came out well!
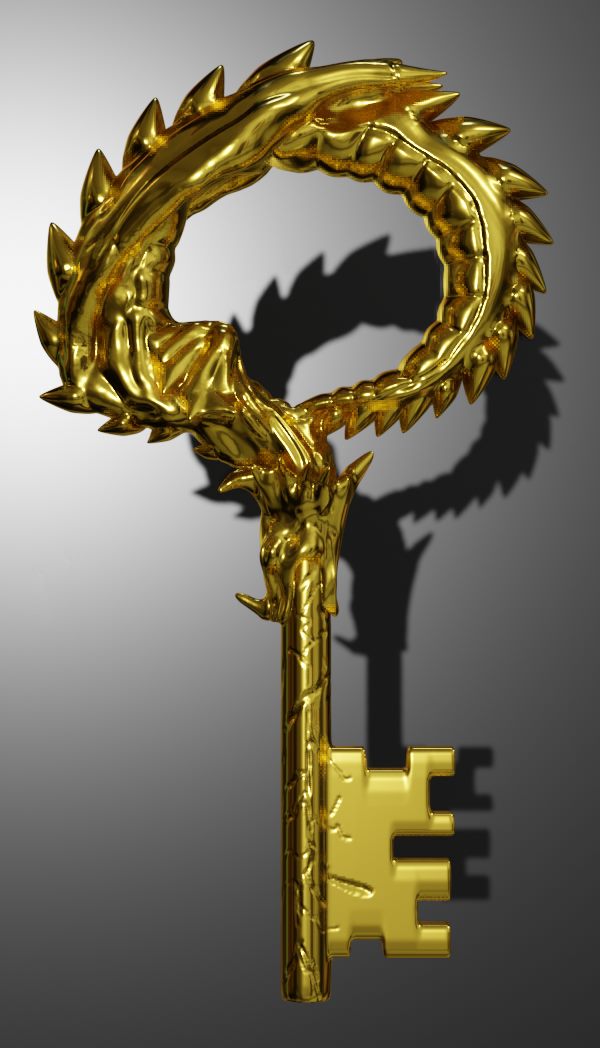
Lets make a quick animation!
TIME FOR SOME 3D PRINTING!!!!!
Using Gray Resin on the Elegoo Mars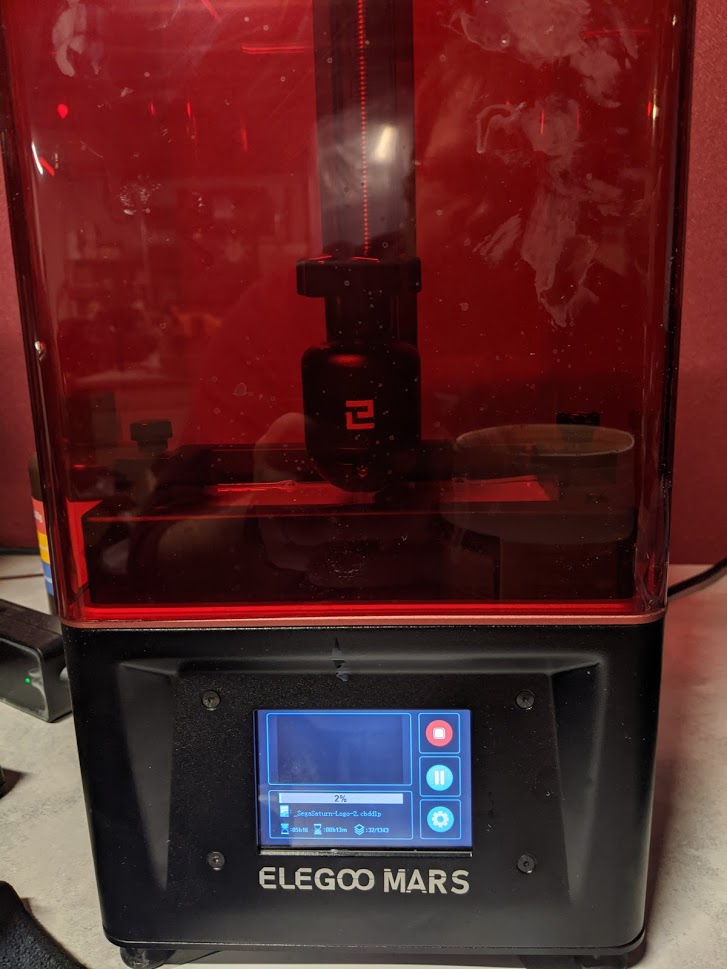
5 hours later…..
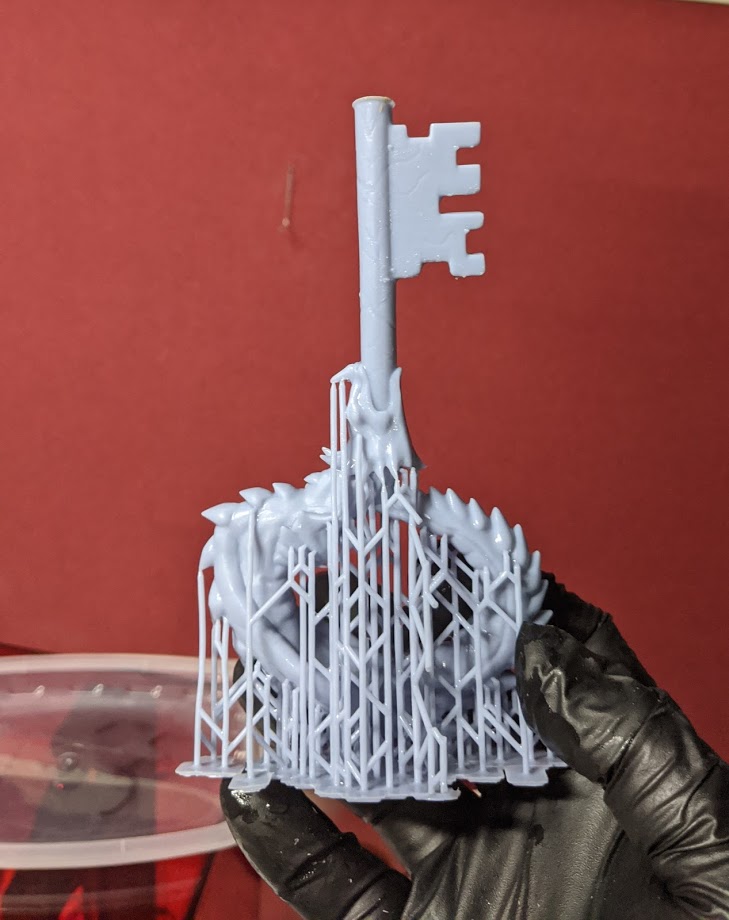
Ta-Da!!! Awesome! Came out PERFECT!!
I threw it into the UltraSonic bath of IPA for 10 minutes, came back and cut off all the supports.
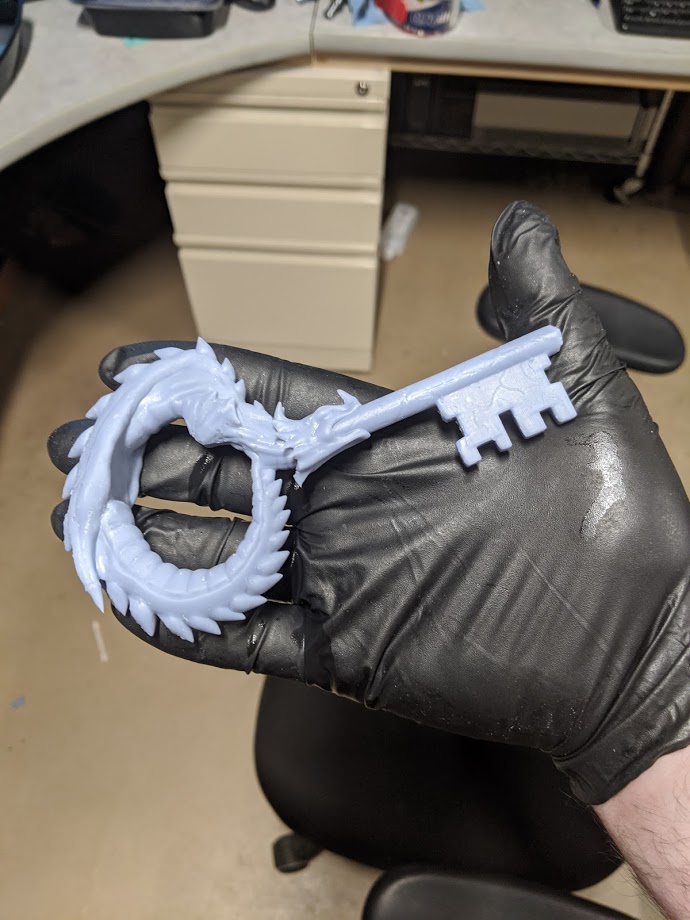
Looked and felt great. did some sanding with the dremil to remove some small supports left on that I couldn’t get with the flush shears.
Left it in the UV light for 12 hours. I’v made 3 so far. One large and two smaller versions, I’m holding the smaller one.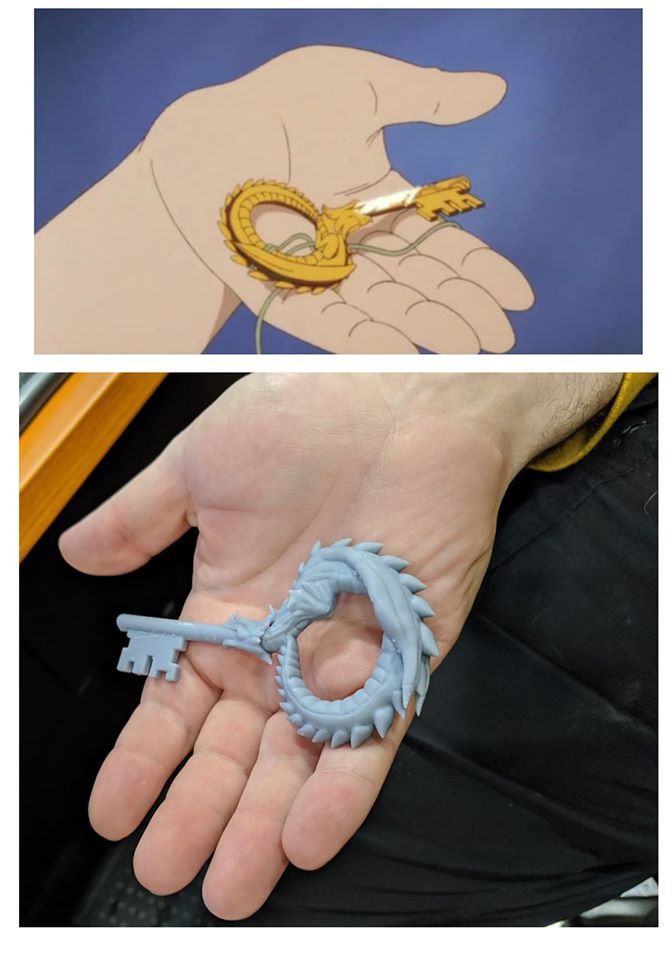
Well that about wraps its up. This model will be available to my Patreons.. (that don’t exist. haha) Well, become and get it!
https://www.patreon.com/AwesomeA
Thanks for reading!
I really like the scales. Keep it up! 🙂
nice. i remember that movie!